Getting started with Raptor
What is Raptor?
![]()
Raptor1 is a modern, fast, and easy-to-use system for building disk images, bootable isos, containers and much more - all from a simple, Dockerfile-inspired syntax.
It uses systemd-nspawn for sandboxing when building or running containers.
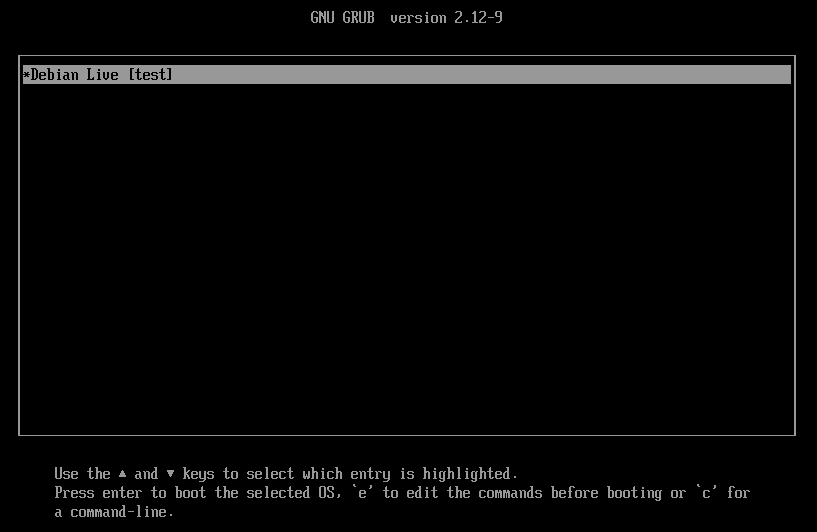
Start by installing raptor, then head over to the Debian Liveboot walkthrough to get a hands-on introduction to building a bootable iso.
Theory of operation
Raptor builds layers from .rapt files. If you are familiar with Docker,
this is similar to how Docker builds containers from a Dockerfile.
However, Raptor has a different scope, and can do considerably different things than Docker.
The entire Raptor project, including this book, the program itself, and the companion project raptor-builders, is still quite young.
If you find (or suspect) any bugs, please report them so everybody can benefit.
At this point, Raptor has reached a stage where breaking changes are rare, but we don’t yet make any particular guarantees. We will try our best to announce major changes clearly, and ahead of time.
If you have questions, ideas or feedback, don’t hesitate to join the discussion.
Syntax
Raptor uses a syntax similar to Dockerfile. Statements start with uppercase
keywords, and are terminated by end of line.
Anything after # is treated as a comment
# This copies "foo" from the host to "/bar" inside the build target
COPY file1 /file1

COPY file2 /file2 # comments can appear here too
Raptor files
Before being parsed as raptor files, .rapt files are processed through
minijinja, a powerful templating
language.
-
According to wikipedia: “The word “raptor” refers to several groups of avian and non-avian dinosaurs which primarily capture and subdue/kill prey with their talons.“. Hopefully, this Raptor is less scary. ↩
Install guide
Currently, the only supported and recommended way to install raptor is by compiling from source. Pre-built binary packages might be available in the future.
New user?
- Complete Install prerequisites
- Complete Install Raptor from git
- Enjoy Raptor 🦅
Install prerequisites
-
Install necessary packages:
sudo apt-get update sudo apt-get install -y git musl-tools -
Install Rust 1.90 or greater:
curl --proto '=https' --tlsv1.2 -sSf https://sh.rustup.rs | sh -
Install
musltarget for rust:rustup target add x86_64-unknown-linux-musl
Now you are ready to install Raptor.
Install Raptor from git [stable]
-
Install
raptorandfalconfrom git:cargo install \ --target "x86_64-unknown-linux-musl" \ --git "https://github.com/chrivers/raptor" \ raptor falcon
The argument --target "x86_64-unknown-linux-musl" is very important!
Without it, Raptor will compile, but Falcon (the sandbox client used for building containers) will not be statically compiled. Since it is running inside sandboxed environments, where glibc is not always available in the correct version (or at all), you will get confusing errors when trying to build Raptor targets.
Consequence: without --target "x86_64-unknown-linux-musl", the cargo install
command will compile and install, but the installation will be broken.
Install Raptor from git [development branch]
This procedure is intended for developers, beta testers, and anyone else who
want to try a specific branch build of Raptor. To test a branch named
hypothetical:
-
Install
raptorandfalconfrom git:cargo install \ --target "x86_64-unknown-linux-musl" \ --git "https://github.com/chrivers/raptor" \ --branch "hypothetical" \ raptor falcon
Making a Debian liveboot iso with Raptor
In this walkthrough, we will take a look at all the steps needed to make a
customized Debian liveboot .iso image.
By putting the image on a USB stick or external hard drive, any computer can be booted from this external device, without affecting existing data on the computer.
Using this technique, you will be able to create custom images, containing the tools, programs and settings that you like, and build them consistently and easily with raptor.
This guide is presented as a three-step process:
-
Build: Build raptor layers suitable for live booting.
-
Generate: Generate a live boot iso from the layers
-
Make: Use raptor-make to simplify the build process [optional]
Create a raptor file:
# Start from a docker iso
FROM docker://debian:trixie

# Set root password to "raptor"
RUN usermod -p "$1$GQf2tS9s$vu72NbrDtUcvvqnyAogrH0" root

# Update package sources, and install packages
RUN apt-get update
RUN apt-get install -qy systemd-sysv live-boot linux-image-amd64
Git clone (or otherwise download) the necessary build container recipes:
git clone https://github.com/chrivers/raptor-builders.git
Then use these to build liveboot.iso:
sudo raptor run -L rbuild raptor-builders '$rbuild.deblive' -I base -O liveboot.iso
After this command has run, you should have the file liveboot.iso available. Enjoy!
To learn how (and why) this works, read the next chapters of this guide.
Building a bootable target
In order to build a raptor target that can be turned into a bootable iso, there are a few requirements we need to consider:
- The distribution must be Debian-based (or, preferably, Debian)
- The package
live-bootmust be installed, since it contains the necessary tools and scripts - A linux kernel package must be installed (e.g.
linux-image-amd64).
Here is an example of a fairly minimal base layer, which can be turned into an iso:
# Start from a docker iso
FROM docker://debian:trixie

# Set root password to "raptor"
RUN usermod -p "$1$GQf2tS9s$vu72NbrDtUcvvqnyAogrH0" root

# Update package sources, and install packages
RUN apt-get update
RUN apt-get install -qy systemd-sysv live-boot linux-image-amd64
The kernel package can take a bit of time to install, so let’s start a new layer for further customization. This way, we don’t need to rebuild the base layer with every change we make to the upper layer:
# Start from previous layer
FROM base

# Update package sources, and install ssh server
RUN apt-get update
RUN apt-get install -qy openssh-server
Of course, these layers could easily be combined, but it is good to get in a habit of separating things into reasonable layers. This improves caching and makes builds faster, since more can be reused between builds.
Now we are ready to build the layers. Since ssh derives from base (which
derives from a docker layer), we just have to request raptor to build
ssh. Raptor automatically determines dependencies, and builds them as needed.
sudo raptor build ssh
You should now see raptor build the ssh layer, with all command output from
the apt-get commands being shown in the terminal.
Once complete, you can quickly verify that the layer is complete, by running the same command again. This time it should very quickly display a message, indicating that each layer is complete:
$ sudo raptor build ssh
[*] Completed [675DE2C3A4D8CD82] index.docker.io-library-debian-trixie
[*] Completed [AB1DD71BFD07718B] base
[*] Completed [80E4F4E5B0E2F6BA] ssh
In the next chapter we will see how we can turn these layers into a bootable iso file.
Generating an iso file
In the last chapter we built some raptor layers that serve as the file content for the bootable iso we want to build.
These layers are very similar to layers in a docker file1.
After building ssh (which implies the base target), their respective
contents can be found in layers/....
Once built like this, it’s possible to “run” the container, like so:
$ sudo raptor run ssh id
[*] Completed [675DE2C3A4D8CD82] index.docker.io-library-debian-trixie
[*] Completed [AB1DD71BFD07718B] base
[*] Completed [80E4F4E5B0E2F6BA] ssh
uid=0(root) gid=0(root) groups=0(root)
Instead of id, an interactive command like sh or bash could be
specified. This is very similar to how docker run works, except raptor
containers are ephemeral by default. If no further options are specified, any
changes made to the container will only be saved while the container is running.
This is all well and good, but we are interested in building a bootable iso from the layers, not just running them as a container.
It turns out that having a stack of layers available, is quite a powerful
primitive. With the right commands, we could build all kinds of output from
them; a .tar.gz file with a release archive, a bootable iso, or even a disk
image for a machine.
In other words, the same input layers can be post-processed into a wide variety of output layers, depending on what you need.
To help get started with this, Raptor provides a standard set of build containers, in the companion project raptor-builders:
- [
deblive] Builds Debian liveboot isos from Raptor layers. - [
disk-image] Builds disk images (for virtual or physical machines) from Raptor layers.
Raptor build containers are just regular Raptor containers, that are configured to expect an input, and produce an output.
The containers from the raptor-builders project are available to anyone,
but are not “built in” to Raptor - they don’t use any special features
or private APIs. Anyone can make build containers that are similar (or
even identical to) raptor-builders.
Since this walkthrough is focused on making a liveboot iso, we’ll use the
deblive builder to convert layers to an iso file.
First, we need to clone (or otherwise download) the raptor-builders project:
git clone https://github.com/chrivers/raptor-builders
This builder uses mounts to access input, output and cache from outside the
container (see MOUNT).
To build the layers from the last step into a debian liveboot iso, use the
following command (assuming raptor-builders is checked out next to the directory
containing ssh.rapt):
sudo raptor run                \
  -L book   book/example       \
  -L rbuild ../raptor-builders \
  -C liveboot-cache            \
  -I '$book.ssh'               \
  -O custom-liveboot.iso       \
  '$rbuild.deblive'
The command above uses the short-form command line options typically used interactively. Long-form options are also available, if greater clarity is desired (e.g. for scripting purposes).
sudo raptor run                    \
  --link book   book/example       \
  --link rbuild ../raptor-builders \
  --cache liveboot-cache           \
  --input '$book.ssh'              \
  --output custom-liveboot.iso     \
  '$rbuild.deblive'
(See the section on module names to learn more about --link
and the $rbuild notation.)
This build process works, but the required command is fairly long and complicated.
In the next chapter, we’ll take a look at raptor-make, and how it can simplify the process.
-
There’s a key difference between how Raptor and Docker handles layers. In Docker, each command (
RUN,COPY, etc) creates a new layer. In Raptor, each.raptfile forms a new layer. ↩
Make
In the previous chapter we took a look at the final command used to build a debian liveboot iso:
sudo raptor run                    \
  --link book   book/example       \
  --link rbuild ../raptor-builders \
  --cache liveboot-cache           \
  --input '$book.ssh'              \
  --output custom-liveboot.iso     \
  '$rbuild.deblive'
As mentioned, this works, but it doesn’t exactly roll off the tongue.
Having to type this command every time we want to build the iso, is not a satisfying solution.
To solve this, the subcommand raptor make is used. It is a
make-like system, where
dependencies are specified in a configuration file.
For make, this is a Makefile, for Rust it’s Cargo.toml, and for raptor make we have Raptor.toml.
Building a Raptor.toml for your project is recommend, but not required. It
is perfectly possible to start using raptor from the command line, and only
write a Raptor.toml file when it feels right.
That being said, the format for Raptor.toml has been designed to be a smooth
transition from a constructed command line. The smallest valid Raptor.toml
file is an empty one.
Let’s start by adding the two linked packages (--link arguments):
We have added two package links, but of course any number can be added as desired.
All sections named [raptor.*] are settings for Raptor. The section
[raptor.link] is for specifying linked packages.
Next, we will define a run job, which accounts for almost all of the remaining
command line arguments.
A Raptor.toml file can have any number of [run.*] sections, each with their
own name. Each of those sections is a separate run job. Let’s use book-ssh
for this example:
[raptor.link]
book = "book/example"
rbuild = "../raptor-builders"
# The name `book-ssh` is not special.
# Feel free to choose any name you like!
[run.book-ssh]
target = "$rbuild.deblive"
cache = "liveboot-cache"
input = "$book.ssh"
output = "custom-liveboot.iso"
Click here for more details on [raptor.link]
Click here for more details on [raptor.link]
You can choose any names for the linked packages.
For example, instaed of this:
[raptor.link]
book = "book/example"
...

[run.example-1]
# $book refers to the link name above
input = "$book.ssh"
...
…the following Raptor.toml is equivalent:
[raptor.link]
example = "book/example"
...

[run.example-2]
# $example refers to the link name above
input = "$example.ssh"
...
Now that we have encoded all the arguments, we can use a much simpler raptor make command to run this build job:
sudo raptor make book-ssh
Raptor Builders
After carefully building a set of layers with Raptor, they are ready to process into more useful build artifacts.
The way this is done in Raptor, is through build containers. These are, themselves, Raptor containers, made specifically for producing a certain kind of output.
Raptor itself does not come with any build containers, but the companion project, raptor-builders does. It’s called the “companion” project to highlight the fact that it is not above other Raptor projects. Anyone can make build containers, and if you need to build something that is uncommon, or specialized to a niche situtation, you might have to.
Most people, however, should be able to get started quickly, and save a lot of time, by using the build containers from raptor-builders.
Meet the builders
| Builder | Output | Supported output formats |
|---|---|---|
deblive | Debian Liveboot iso | iso |
live-disk-image | Debian Liveboot disk image | raw, qcow2, vmdk, … |
disk-image | Disk image | raw, qcow2, vmdk, … |
part-image | Partition (filesystem) image | raw, qcow2, vmdk, … |
docker-image | Docker image | tar |
Compatibility
The various builders can construct a wide variety of outputs, suitable for use
with both containers (systemd-nspawn), virtual machines (e.g. qemu), and
physical hardware.
However, not all combinations are possible. For example, a physical machine will
not boot a qcow2 image for virtual machines, but qemu will be able to boot
either qcow2 or raw images.
The tables below provides an overview of the possible options.
Machines:
| Builder | Format | Virtual Machine | Physical Machine |
|---|---|---|---|
deblive | iso | UEFI:✅ – BIOS:✅ | UEFI:✅ – BIOS:✅ |
live-disk-image | qcow2 | UEFI:✅ – BIOS:❌ | UEFI:❌ – BIOS:❌ |
disk-image | qcow2 | UEFI:✅ – BIOS:❌ | UEFI:❌ – BIOS:❌ |
live-disk-image | raw | UEFI:✅ – BIOS:❌ | UEFI:✅ – BIOS:❌ |
disk-image | raw | UEFI:✅ – BIOS:❌ | UEFI:✅ – BIOS:❌ |
part-image | raw | UEFI:❌ – BIOS:❌ | UEFI:❌ – BIOS:❌ |
docker-image | tar | UEFI:❌ – BIOS:❌ | UEFI:❌ – BIOS:❌ |
Currently, booting in BIOS mode is only supported by the deblive builder, but
the live-disk-image and disk-image builders could possibly be extended to
support this, in the future.
Containers:
| Builder | Format | systemd-nspawn | docker | podman |
|---|---|---|---|---|
deblive | iso | ❌ | ❌ | ❌ |
live-disk-image | qcow2 | ❌ | ❌ | ❌ |
disk-image | qcow2 | ❌ | ❌ | ❌ |
live-disk-image | raw | ❌ | ❌ | ❌ |
disk-image | raw | ✅ | ❌ | ❌ |
part-image | raw | ✅ | ❌ | ❌ |
docker-image | tar | ❌ | ✅ | ✅ |
Debian Liveboot iso generator:
deblive
This builder requires an input from the Debian family.
It should work for Debian derivatives (Ubuntu, etc), as long as the prerequisite packages are installed.
This builder generates an iso file suitable for live booting. All layers are
packed into read-only squashfs files, which are mounted using overlayfs, on
boot.
| Mount | Type | Usage |
|---|---|---|
cache | Simple | Contains cache of previously built .squashfs files.(to avoid expensive rebuilds) |
input | Layers | The Raptor build target(s) that will be put on the iso |
output | File | Points to the resulting output file. |
This builder has a 📕 detailed walkthrough.
If multiple targets are specified, each will get its own GRUB menu entry in the boot menu.
The menu order will be the same as the order the input targets are specified
in, and the first input will be the default boot option.
Compatibility
| Target | Compatible? |
|---|---|
Container: systemd-nspawn | ❌ |
Container: docker | ❌ |
Container: podman | ❌ |
| Virtual Machine (UEFI) | ✅ |
| Virtual Machine (BIOS) | ✅ |
| Physical Machine (UEFI) | ✅ |
| Physical Machine (BIOS) | ✅ |
Debian liveboot ISOs are widely compatible with both physical and virtual machines, including UEFI and BIOS-based platforms.
The deblive builder is not compatible with systemd-nspawn, since liveboot
requires initrd support to perform overlayfs mounting.
Example
Prerequisites:
- raptor-builders is cloned to
raptor-builders - An input target called
test.rapt
[raptor.link]
rbuild = "raptor-builders"

[run.iso1]
target = "$rbuild.deblive" # <-- builder is specified here
cache = "cache2"
input = ["test"]
output = "live.iso"
env.GRUB_TIMEOUT = "0"
After this Raptor.toml is in place, call raptor make to build:
sudo raptor make iso1
When the process is complete, live.iso will be ready for use.
Debian Liveboot Disk Image generator:
live-disk-image
This builder requires an input from the Debian family.
It should work for Debian derivatives (Ubuntu, etc), as long as the prerequisite packages are installed.
| Mount name | Type | Usage |
|---|---|---|
cache | Simple | Contains cache of previously built .squashfs files.(to avoid expensive rebuilds) |
input | Layers | The Raptor build target(s) that will be put on the generated image |
output | File | Points to the resulting output file. |
Compatibility
| Target | Compatible? |
|---|---|
Container: systemd-nspawn | ❌ |
Container: docker | ❌ |
Container: podman | ❌ |
| Virtual Machine (UEFI) | ✅ (raw, qcow2) |
| Virtual Machine (BIOS) | ❌ |
| Physical Machine (UEFI) | ✅ (raw) |
| Physical Machine (BIOS) | ❌ |
This builder also generates Debian Liveboot image, but instead of generating a
.iso file, it generates a disk image, including a partition table, and
separate partitions for /, /boot and /boot/efi.
The result is a disk image that allows a physical or virtual machine to boot
normally, but with the root file system mounted as overlayfs backed by the
squashfs files for each layer.
It uses the Discoverable Partitions Specification1 to make the images
compatible with both physical hardware, virtual machines, and systemd-nspawn.
Example
Prerequisites:
- raptor-builders is cloned to
raptor-builders - An input target called
test.rapt
[raptor.link]
rbuild = "raptor-builders"

# Live disk image (raw)
[run.live1]
target = "$rbuild.live-disk-image" # <-- builder is specified here
cache = "cache2"
input = ["test"]
output = "live.img"
## implied default:
## env.GRUB_TIMEOUT = "5"
## env.OUTPUT_FORMAT = "raw"

# Live disk image (qcow2, no boot delay)
[run.live2]
target = "$rbuild.live-disk-image" # <-- builder is specified here
cache = "cache2"
input = ["test"]
output = "live.qcow2"
env.GRUB_TIMEOUT = "0"
env.OUTPUT_FORMAT = "qcow2"
After this Raptor.toml is in place, call raptor make to build:
sudo raptor make live1 live2
When the process is complete, live.img and live.qcow2 will be ready for use.
Disk Image generator:
disk-image
| Mount name | Type | Usage |
|---|---|---|
input | Overlay | The Raptor build target that will be put into the generated image |
output | File | Points to the resulting output file. |
Compatibility
| Target | Compatible? |
|---|---|
Container: systemd-nspawn | ✅ (raw) |
Container: docker | ❌ |
Container: podman | ❌ |
| Virtual Machine (UEFI) | ✅ (raw, qcow2) |
| Virtual Machine (BIOS) | ❌ |
| Physical Machine (UEFI) | ✅ (raw) |
| Physical Machine (BIOS) | ❌ |
This builder generates disk images, including a partition table, and separate
partitions for /, /boot and /boot/efi.
It uses the Discoverable Partitions Specification1 to make the images
compatible with both physical hardware, virtual machines, and systemd-nspawn.
Example
Prerequisites:
- raptor-builders is cloned to
raptor-builders - An input target called
test.rapt
[raptor.link]
rbuild = "raptor-builders"

# Disk image (raw)
[run.disk1]
target = "$rbuild.disk-image" # <-- builder is specified here
input = ["test"]
output = "disk.img"
## implied default:
## env.OUTPUT_FORMAT = "raw"

# Disk image (qcow2)
[run.disk2]
target = "$rbuild.disk-image" # <-- builder is specified here
input = ["test"]
output = "disk.qcow2"
env.OUTPUT_FORMAT = "qcow2"
After this Raptor.toml is in place, call raptor make to build:
sudo raptor make disk1 disk2
When the process is complete, disk.img and disk.qcow2 will be ready for use.
Partition Image generator:
part-image
| Mount name | Type | Usage |
|---|---|---|
input | Overlay | The Raptor build target that will be put into the generated image |
output | File | Points to the resulting output file. |
Compatibility
| Target | Compatible? |
|---|---|
Container: systemd-nspawn | ✅ |
Container: docker | ❌ |
Container: podman | ❌ |
| Virtual Machine (UEFI) | ❌ |
| Virtual Machine (BIOS) | ❌ |
| Physical Machine (UEFI) | ❌ |
| Physical Machine (BIOS) | ❌ |
This builder generates partition images, containing a single filesystem.
In other words, this image can be put into a partition, but does not contain a partition table.
The primary use case is for building systemd-nspawn images, but this builder
is also useful in other specialty applications – for example,
efibootguard, a bootloader that
supports A/B partitions for upgrade and recovery.
Since efibootguard uses Unified Kernel Images, an update image typically consists of just a single filesystem. Such an image could be produced by this builder.
Example
Prerequisites:
- raptor-builders is cloned to
raptor-builders - An input target called
test.rapt
[raptor.link]
rbuild = "raptor-builders"

# Partition (filesystem) image
[run.part1]
target = "$rbuild.part-image" # <-- builder is specified here
input = "test"
output = "part.img"
After this Raptor.toml is in place, call raptor make to build:
sudo raptor make part1
When the process is complete, part.img will be ready for use.
Docker Image generator:
docker-image
| Mount name | Type | Usage |
|---|---|---|
input | Layers | The Raptor build target to genrate as a docker image. |
output | File | Points to the resulting docker image file. |
cache(Optional) | Simple | Cache for tar files of built layers. Will save time when repeating layers between builds. |
This builder generates a Docker image from a Raptor target.
Each layer in Raptor (one for the target, plus one for each FROM) becomes a
Docker layer in the generated image. This allows shared Raptor layers to stay
shared when converted to Docker images.
Compatibility
| Target | Compatible? |
|---|---|
Container: systemd-nspawn | ❌ |
Container: docker | ✅ |
Container: podman | ✅ |
| Virtual Machine (UEFI) | ❌ |
| Virtual Machine (BIOS) | ❌ |
| Physical Machine (UEFI) | ❌ |
| Physical Machine (BIOS) | ❌ |
Example
Prerequisites:
- raptor-builders is cloned to
raptor-builders - An input target called
test.rapt
[raptor.link]
rbuild = "raptor-builders"

# Docker image
[run.docker1]
target = "$rbuild.docker-image" # <-- builder is specified here
input = ["test"]
output = "test.tar"
## to speed up builds with shared layers,
## specify a cache directory:
# cache = "/tmp/docker-image-cache"
After this Raptor.toml is in place, call raptor make to build:
sudo raptor make docker1
When the process is complete, test.tar will be ready for use.
It can be imported:
# import to Docker
docker load -i test.tar

# import to Podman
podman load -i test.tar
Environment variables
Several settings can be adjusted via environment variables. These can be specified either on the command line:
sudo raptor run -e OUTPUT_FORMAT=qcow2 ...
or in Raptor.toml:
[run.example-target]
target = "example"

# notice the `env.` prefix!
env.OUTPUT_FORMAT = "qcow2"
Environment reference
| Variable | deblive | live-disk-image | disk-image | part-image |
|---|---|---|---|---|
GRUB_TIMEOUT | ✅ | ✅ | ❌ | ❌ |
OUTPUT_FORMAT | ❌ | ✅ | ✅ | ✅ |
EFI_MB | ❌ | ✅ | ✅ | ❌ |
BOOT_MB | ❌ | ✅ | ✅ | ❌ |
FREE_MB | ❌ | ✅ | ✅ | ✅ |
USED_MB | ❌ | ✅ | ✅ | ✅ |
SIZE_MB | ❌ | ✅ | ✅ | ✅ |
GRUB_TIMEOUT
- Default:
5 - Supported by:
deblive,live-disk-image
The auto-generated GRUB boot menu will use GRUB_TIMEOUT as the countdown until
automatically booting the first target.
Setting this to 0 will boot without showing the GRUB menu.
OUTPUT_FORMAT
- Default:
raw - Supported by:
live-disk-image,disk-image,part-image
Output format of the image. Common values include raw and qcow2.
See qemu-img --help for the complete list
EFI_MB
- Default:
32 - Supported by:
live-disk-image,disk-image
Size of ESP, the EFI System Partition (/boot/efi).
BOOT_MB
- Default:
512 - Supported by:
live-disk-image,disk-image
Size of the boot partition (/boot)
FREE_MB
- Default:
512 - Supported by:
live-disk-image,disk-image,part-image
How much free space to target in the resulting image.
USED_MB
- Default: none
- Supported by:
live-disk-image,disk-image,part-image
Total disk space of all files in the root filesystem.
Calculated when building the image, unless specified manually.
SIZE_MB
- Default: none
- Supported by:
live-disk-image,disk-image,part-image
The size of the resulting image.
Calculated as:
live-disk-image:EFI_MB + BOOT_MB + USED_MB + FREE_MBdisk-image:EFI_MB + BOOT_MB + USED_MB + FREE_MBpart-image:USED_MB + FREE_MB
unless specified manually for exact control.
Module names
In Raptor, “module names” are the names Raptor files use to refer to other Raptor files.
This is the case both for the FROM instruction (where the modules have the
.rapt extension) and INCLUDE (.rinc extension).
There are three types of module names; Relative, Absolute and Package names.
| Type | Example | Description |
|---|---|---|
| Relative | foo.bar | Used to refer to paths at or below the current directory |
| Absolute | $.foo.bar | Used to refer to paths from the root of the current package |
| Package | $foo.bar | Used to refer to paths in other packages |
The difference between these forms is how they resolve to paths in the filesystem. For a detailed explanation of each, see the following sections.
Instancing
Each of these forms support instancing, which is a way to pass a single,
simple parameter through the module name, by appending a @ followed by the
value, to the module name.
All raptor files are either instanced (example@.rapt / example@.rinc) or not
(example.rapt / example.rinc).
Non-instanced files cannot be referenced with an instanced name, and vice versa.
Users of systemd might recognize this pattern, which is used in the same way
there.
To learn more, read the section on instancing.
Learn more
Each type of module name is described in more detail:
Relative module names
The first, and arguably simplest form, is the Relative name. It is
characterized by not having a dollar sign ($) in front of the first element,
unlike the other two forms.
Relative module paths form a sequence of one or more elements, which are the
names between the dots (.).
Each element before the last is viewed as a directory. The last element is the
file name, appended with either .rapt for FROM instructions, or .rinc for
INCLUDE instructions.
In other words, a.b.c.d becomes a/b/c/d.rapt (FROM) or a/b/c/d.rinc (INCLUDE).
Examples:
| Statement | Source file | Resulting path |
|---|---|---|
FROM base | target.rapt | base.rapt |
FROM base | lib/target.rapt | lib/base.rapt |
FROM utils.base | lib/target.rapt | lib/utils/base.rapt |
INCLUDE babelfish | lib/target.rapt | lib/babelfish.rinc |
INCLUDE hitchhiker.guide | lib/target.rapt | lib/hitchhiker/guide.rinc |
Absolute module names
Relative module names are simple, but lack the ability to point upwards in the directory heirarchy.
For example, suppose you want to organize a set of Raptor files like so:
~/project/base.rapt
~/project/hostname.rinc
~/project/target/common.rapt
~/project/target/frontend.rapt
~/project/target/database.rapt
~/project/lib/utils/tools.rinc
The base layer can INCLUDE hostname, but the frontend and database
targets have no way to specify they want to build FROM the base layer!
This is where absolute module names are useful.
By prefixing a name with $. (dollar + dot) the name refers to the root of the
current package.
We will go into more detail of what a package is, in the next section. For now,
it is enough to know that when invoking raptor on a target, the root for that
target is the directory that raptor was started from.
| Statement | Source file | Resulting path |
|---|---|---|
FROM $.base | target/frontend.rapt | base.rapt |
FROM common | target/frontend.rapt | target/common.rapt |
FROM $.target.common | target/frontend.rapt | target/common.rapt |
INCLUDE $.lib.utils.tools | target/database.rapt | lib/utils/tools.rapt |
Package module names
In the previous section, we briefly mentioned packages.
Raptor is designed to work collaboratively, encouraging sharing of code between projects, and people. A Raptor package is simply a collection of useful Raptor files, typically distributed as a git repository.
This means we need a robust way to refer to Raptor files outside of our current project, as well as a way to tell Raptor how to find these files.
This is where package module names are used.
First, let us take a look at how to make Raptor aware of external code bases. This is called linking, analogous to how the term is used when building a program from several sources.
When invoking raptor, the -L option defines a linked raptor package:
sudo raptor -L name src ...
For example, imagine we are working on a web service, and we want to generate the deployment with Raptor. Now imagine this requires a database server, and that someone else is responsible for the Raptor code that controls the database.
Then we might have a file layout like so:
~/project/web/server.rapt
~/project/database/db-setup.rinc
We fully control ~/projects/web, but ~/project/database is a git repository
we only pull changes from.
We would like to INCLUDE the db-setup module, but it exists outside our own
repository.
This can be solved by declaring database as linked package:
$ cd ~/project/web
$ sudo raptor build server -L database ../database
Now, we can refer to the content of ../database by using $database.
We don’t have to give the link the same name as the directory it refers to!
If we link with -L lib1 ../database, we could instead refer to it as $lib1.db-setup.
Feel free to use any link name that suits the project; the linked names have no impact outside your project.
Instancing
Raptor files can be instanced, which makes them work as a template.
Instanced files can be recognized by ending in @.rapt (for FROM) or @.rinc
(for INCLUDE).
File names and syntax
| File | Instanced? | Example |
|---|---|---|
base.rapt | No | FROM base |
server@.rapt | Yes | FROM server@production |
settings.rinc | No | INCLUDE settings |
firewall@.rinc | Yes | INCLUDE firewall@full |
The table above shows some examples of instanced and non-instanced Raptor files.
It is invalid to reference an instanced file without an instance.
For example, FROM server@ or FROM base@value would both fail to compile.
Therefore, when writing a new Raptor file, you need to determine if it needs to be instanced, and name the file accordingly.
Using instancing
So far, we have seen how to create templated (instanced) Raptor files, and how to reference them to provide a value.
Now we will see how to use the provided value, so that instancing becomes useful. Let us start the simplest possible example
This writes a human-readable line of text to a file, including the instance id.
Now we can use it from another file:
Strings
In raptor files, string values can be expressed as quoted strings, or in certain cases as so-called barewords:
RUN echo these are barewords

RUN "echo" "these" "are" "quoted" "string"
For example, the following two statements are equivalent:
RUN echo word1 word2

RUN echo "word1" "word2"
But the following two statements are not:
# This creates 1 file called "filename with spaces"
RUN touch "filename with spaces"

# This creates *3 files* called "filename", "with", and "spaces", respectively
RUN touch filename with spaces
Think of barewords as a convenience, to avoid needing to quote everything all the time.
It is always valid and safe to use quoted strings to clearly convey the intended meaning.
When in doubt, use quotes.
String escaping
When using a quoted string, the backslash character (\) gains special meaning,
and is known as the escape character.
When it is followed by certain other characters, the combined expression is replaced in the string:
| Escape expression | Result |
|---|---|
\\ | A single literal backslash |
\n | Newline (as if the string continued on the next line of text) |
\t | Tabulator (useful to make tab clearly visible, and copy-paste proof) |
\" | Quote character (as opposed to ending the string) |
A backslash followed by any other character will result in a parse error.
Because backslash (\) is used as the escape character in quoted strings, any
literal backslashes must themselves be escaped, by adding another backslash
(\\).
Expressions
Raptor supports a limited form of inline literal expressions (i.e. “values”),
that can be specified when using the INCLUDE and RENDER instructions.
Booleans
Boolean values work identically to json (and many other languages):
| Literal | Value |
|---|---|
true | true |
false | false |
Integers
Integer values are supported.
Be aware that raptor always uses i64 (signed 64-bit) integers.
This is unlike the typical json implementations, that uses f64 (64-bit
floating-point) numbers, in two important ways:
A) The valid range for i64 integers is -9223372036854775808 to
9223372036854775807, inclusive. This should be sufficient for most
applications. Any integer in this range will be represented exactly.
B) Floating-point (i.e. fractional) numbers are not supported. For example,
3.14 is not valid in raptor. Instead, consider passing such a value as a
string.
Currently, alternate integer bases (i.e. hexadecimal or octal) are not supported.
Strings
String are supported, and work much like they do in json, or other common notations.
See the section on string escapes for more details.
Lists
Lists are supported, with a syntax very similar to json. The only difference is that raptor allows an optional trailing comma after the last list element, while json does not.
Maps
Maps (also typically known as dicts or hashmaps) contain a set of (key, value) pairs.
The syntax is similar to json. Like lists, raptor allows an optional trailing comma after the last key-value pair.
File options
Several instructions (COPY, WRITE, RENDER, MKDIR) write files into the
build target. They all supports common options that affect how the files are
written.
File options must be specified after the instruction (i.e. before source or destination path)
Change mode: --chmod <mode>
The --chmod option specifies the mode bits (i.e. permissions) associated with
the file. The mode is specified as 3 or 4 octal digits.
Examples:
# these are equivalent:
COPY --chmod  755 script.sh /root/script.sh
COPY --chmod 0755 script.sh /root/script.sh

# set suid bit:
COPY --chmod 4755 sudo /usr/bin/sudo

# user access only, read-only:
WRITE --chmod 0400 "secret" /etc/service/token
The 3-digit version is identical to the 4-digit version, where the first digit
is zero (which is a common case).
For example, 755 and 0755 represent the same permissions.
Change owner: --chown <owner>
The --chown option specifies the user and/or group to own the file.
| Input | User | Group |
|---|---|---|
user | user | (no change) |
: | (no change) | (no change) |
:group | (no change) | group |
user:group | user | group |
user: | user | user (!) |
Notice the last form, where user: is shorthand for user:user.
This is the same convention used by GNU coreutils, and several other programs.
Create parent directories: -p
The -p option instructs MKDIR to create parent directories as needed.
Importantly, it also makes MKDIR accept existing directories, including the
last directory.
This is identical to the behavior of -p with the shell command mkdir.
# will fail if:
#   A) /foo is missing
# or:
#   B) /foo/bar already exists
MKDIR /foo/bar

# this will create:
#   /foo (if missing)
# and then
#   /foo/bar (if missing)
MKDIR -p /foo/bar
Mount types
For an introduction to mounts, see the MOUNT referrence.
When running containers, Raptor supports mounting various file resources into the container namespace.
In the simplest form, this means presenting a directory from the host environment, at a specified location in the container.
This is equivalent to how Docker uses volume mounts (-v / --volume).
However, Raptor supports more than just mounting directories:
| Type | Description | Access |
|---|---|---|
MOUNT --simple ... | Mounts a directory from the host (default) | Read/write |
MOUNT --file ... | Mounts a single file from the host | Read/write |
MOUNT --layers ... | Mounts a view of set of layers as directories | Read-only |
MOUNT --overlay ... | Mounts a view of the sum of a set of layers | Read-only |
If no mount type is specified, --simple is implied as the default.
For clarity, it is recommended to always specify a mount type.
Read more about the specific mount types:
Options
All mount types take two optional arguments:
| Argument | Description |
|---|---|
--readonly | Mount the file or directory read-only. (for --layers/--overlay this is always implied). |
--readwrite | Mount the file or directory read-write. (for --layers/--overlay this is invalid). |
--optional | Allow starting the container, even if this mount is not specified. |
--required | Deny starting the container, unless this mount is specified. |
Examples
# Both options can be combined:
MOUNT --readonly --optional --simple input /input

# Optional layers mount:
MOUNT --optional --layers input /data

# Later --required overrides previous --optional:
MOUNT --optional --required --layers input /data
Mount type --simple
This is the default mount type.
A --simple mount will mount a directory from the host into the
container. Docker users are likely to be familiar with this concept.
Example
This container can be run, to provide a file listing on the mounted directory:
$ sudo raptor run file-lister -M list /tmp
... <"ls" output would be shown here> ...
Mount type --file
This mount type requires that a single file is mounted.
When running a raptor container with a --file mount, the target file will be created if it does not exist.
Example
Let us expand on the earlier example, to make the file lister provide output to a file.
FROM docker://debian:trixie

MOUNT --simple input /input
MOUNT --file output /output

CMD "ls -l /input > /output"
Now that we have named the mounts input and output, we can use the
shorthand notation for convenience:
$ sudo raptor run file-lister-output -I /etc -O /tmp/filelist.txt
...
$ sudo cat /tmp/filelist.txt
... <"ls" output would be shown here> ...
The above example would generate a file listing of /etc from the host, and
place it in /tmp/filelist.txt. However, the execution of ls takes place in
the container.
For example, multiple targets in the raptor builders project uses this mount type for output files.
Mount type --layers
The --simple and --file mount types both present content from the host
filesystem inside the container, and both have equivalents in Docker.
This is not the case for --layers, which is specific to Raptor.
When using a --layers mount, the input argument when running Raptor is not a
file path, but a set of Raptor build targets.
Let us take a look at a target, that lists the files in a --layers mounts:
Let’s try running this, using the previous file-lister.rapt target as input:
$ sudo raptor run layers-lister -I file-lister
total 12
drwxr-xr-x  2 root root 4096 Oct 17 13:37 file-lister-16689594BA5D2989
drwxr-xr-x 17 root root 4096 Sep 29 00:00 index.docker.io-library-debian-trixie-675DE2C3A4D8CD82
-rw-r--r--  1 root root  200 Oct 17 13:37 raptor.json
We see that each layer in the input is available as a directory, but also a
raptor.json file.
Think of this file as a manifest of the contents in the --layers mount. It
contains useful metadata about the inputs, including which targets have been
specified, as well as the stacking order for each target:
{
  "targets": [
    "file-lister"
  ],
  "layers": {
    "file-lister": [
      "index.docker.io-library-debian-trixie-675DE2C3A4D8CD82",
      "file-lister-16689594BA5D2989"
    ]
  }
}
At first, this might seem like overly complicated. If we just needed the layer order, surely a simple text file would suffice?
In fact, multiple build targets can be specified at the same time:
$ sudo raptor run layers-lister -I file-lister -I file-lister-output
total 16
drwxr-xr-x  2 root root 4096 Oct 17 11:33 file-lister-16689594BA5D2989
drwxr-xr-x  2 root root 4096 Oct 17 11:31 file-lister-output-2CFDE4FEBD507157
drwxr-xr-x 17 root root 4096 Sep 29 00:00 index.docker.io-library-debian-trixie-675DE2C3A4D8CD82
-rw-r--r--  1 root root  381 Oct 17 11:45 raptor.json
We now have multiple build targets, and the Docker layer is shared between both inputs.
However, we can still make sense of this using raptor.json:
{
  "targets": [
    "file-lister",
    "file-lister-output"
  ],
  "layers": {
    "file-lister-output": [
      "index.docker.io-library-debian-trixie-675DE2C3A4D8CD82",
      "file-lister-output-2CFDE4FEBD507157"
    ],
    "file-lister": [
      "index.docker.io-library-debian-trixie-675DE2C3A4D8CD82",
      "file-lister-16689594BA5D2989"
    ]
  }
}
This mount type is useful for any build container that needs to work the contents of individual layers.
For example, the deblive builder uses this mount type, in order to
build Debian liveboot images.
Mount type --overlay
Like --layers, this is a Raptor-specific mount type.
Raptor targets are almost always built from a set of layers (i.e., there’s at
least one FROM instruction).
When running a raptor container, this stack of layers is combined using
overlayfs, which makes the kernel present them to the container as a single,
unified filesystem.
For build containers that need to operate on this combined view of a build
target, the --overlay mount type is available.
For example, the disk-image builder uses this mount type, in order to
build disk images for virtual (or physical) machines.
$ sudo raptor run overlay-lister -I file-lister
total 60
lrwxrwxrwx  1 root root    7 Aug 24 16:20 bin -> usr/bin
drwxr-xr-x  2 root root 4096 Aug 24 16:20 boot
drwxr-xr-x  2 root root 4096 Sep 29 00:00 dev
drwxr-xr-x 27 root root 4096 Sep 29 00:00 etc
drwxr-xr-x  2 root root 4096 Aug 24 16:20 home
lrwxrwxrwx  1 root root    7 Aug 24 16:20 lib -> usr/lib
lrwxrwxrwx  1 root root    9 Aug 24 16:20 lib64 -> usr/lib64
drwxr-xr-x  2 root root 4096 Sep 29 00:00 media
drwxr-xr-x  2 root root 4096 Sep 29 00:00 mnt
drwxr-xr-x  2 root root 4096 Sep 29 00:00 opt
drwxr-xr-x  2 root root 4096 Sep 29 00:00 proc
drwx------  2 root root 4096 Sep 29 00:00 root
drwxr-xr-x  3 root root 4096 Sep 29 00:00 run
lrwxrwxrwx  1 root root    8 Aug 24 16:20 sbin -> usr/sbin
drwxr-xr-x  2 root root 4096 Sep 29 00:00 srv
drwxr-xr-x  2 root root 4096 Aug 24 16:20 sys
drwxrwxrwt  2 root root 4096 Sep 29 00:00 tmp
drwxr-xr-x 12 root root 4096 Sep 29 00:00 usr
drwxr-xr-x 11 root root 4096 Sep 29 00:00 var
Raptor make
Overall structure
Below is an example of the overall structure of a Raptor.toml file.
Note: All parts are optional, so you only need to define the parts you need.
[raptor.link]
name1 = "path/to/source1"
name2 = "path/to/source2"
...

[run.purple]
# ..run target here..

[run.orange]
# ..run target here..

[group.green]
# ..group here..

[group.yellow]
# ..group here..
Run target format
A run target ([run.<name>]) is the most commonly used feature in
Raptor.toml.
The structure for a job named example is shown below, where each field is
specified with its default value.
Note: Only the target field is required! Everything else can be specified as needed.
[run.example]
target = <required>

# Cache mounts
# (default is empty list)
#
# Note: A single element can be specified as a string instead of the list
cache = []

# Input mounts
# (default is empty list)
#
# Note: A single element can be specified as a string instead of the list
input = []

# Output mounts
# (default is empty list)
#
# Note: A single element can be specified as a string instead of the list
output = []

# Entrypoint arguments
entrypoint = []

# Command arguments
args = []

# BTreeMap<String, String>
env = {}

# State directory for container state
# (default is unset, meaning ephemeral containers)
#state_dir =
Group format
A group is used to collectively refer to a number of run and build jobs, by a single name.
[group.example]
# List of layers to build
#
# Default is empty list
build = []

# List of names for [run.<name>] targets to run
#
# Default is empty list
run = []
Grammar
The Raptor parser is implemented by hand in a separate crate.
Because it is hand-written, there is no exact BNF grammar that matches the parsing.
The following is an attempt to provide a detailed and realistic description of the accepted syntax, but might contain minor mistakes and inconsistencies.
The parsing starts from the first rule, <file>, and proceeds from there.
| Syntax | Meaning |
|---|---|
rule? | Match rule 0 or 1 times (i.e., it is optional) |
rule+ | Match rule 1 or more times |
rule* | Match rule 0 or more times |
rule1 | rule2 | Match either rule1 or rule2 (exactly one of them must match) |
( rule1 rule2 .. ) | Parenthesized rules are matched/optional/repeated together |
"word" | Matches the letters w, o, r, d (but not the quotes) |
<file>         ::= <statement>*

<statement>    ::= <from>
                 | <mount>
                 | <render>
                 | <write>
                 | <mkdir>
                 | <copy>
                 | <include>
                 | <run>
                 | <env>
                 | <workdir>
                 | <entrypoint>
                 | <cmd>

<from>         ::= "FROM" <from-source> "\n"
<mount>        ::= "MOUNT" <mount-type>? <word> <path> "\n"
<render>       ::= "RENDER" <file-option>* <path> <path> <include-arg>* "\n"
<write>        ::= "WRITE" <file-option>* <value> <path> "\n"
<mkdir>        ::= "MKDIR" <mkdir-option>* <path> "\n"
<copy>         ::= "COPY" <file-option>* <path>+ <path> "\n"
<include>      ::= "INCLUDE" <module-name> <include-arg>* "\n"
<run>          ::= "RUN" <word>+ "\n"
<env>          ::= "ENV" <env-assign>+ "\n"
<workdir>      ::= "WORKDIR" <path> "\n"
<entrypoint>   ::= "ENTRYPOINT" <word>* "\n"
<cmd>          ::= "CMD" <word>* "\n"

<env-assign>   ::= <word> ( "=" <value> )?
<mount-type>   ::= "--file" | "--simple" | "--layers" | "--overlay"

<mkdir-option> ::= <file-option> | "-p"
<file-option>  ::= <file-chown> | <file-chmod>
<file-chown>   ::= "--chown" "="? <chown>
<file-chmod>   ::= "--chmod" "="? <chmod>
<chown>        ::= (<word> (":" <word>?)?) | (":" <word>?)
<chmod>        ::= /* built-in rule: 3 or 4 octal digits */

<include-arg>  ::= <word> ( "=" <expression> )?
<expression>   ::= <expr-lookup> | <expr-value>
<expr-lookup>  ::= <word> ("." <word>)*
<expr-value>   ::= <expr-list>
                 | <expr-map>
                 | <expr-string>
                 | <expr-number>
                 | <expr-bool>
<expr-list>    ::= "[" ( <expr-value>   ( "," <expr-value>   )* ","? )? "]"
<expr-map>     ::= "{" ( <expr-mapitem> ( "," <expr-mapitem> )* ","? )? "}"
<expr-mapitem> ::= <expr-value> ":" <expr-value>
<expr-string>  ::= /* built-in rule: see section on string escapes */
<expr-number>  ::= <digit>+
<expr-bool>    ::= "true" | "false"
<digit>        ::= "0" | "1" | "2" | "3" | "4" | "5" | "6" | "7" | "8" | "9"

<module-name>  ::= <mn-package>? <mn-body> <mn-instance>?
<mn-package>   ::= "$" <word>? "."
<mn-body>      ::= <word> ( "." <word> )*
<mn-instance>  ::= "@" <word>
| Instruction | Multiple valid? | Build or Run |
|---|---|---|
FROM | No | Build |
RUN | Yes | Build |
ENV | Yes | Build |
WORKDIR | Yes | Build |
WRITE | Yes | Build |
MKDIR | Yes | Build |
COPY | Yes | Build |
INCLUDE | Yes | Build |
RENDER | Yes | Build |
MOUNT | Yes | Run |
ENTRYPOINT | No | Run |
CMD | No | Run |
Instruction: FROM
The FROM instruction bases the current layer on top of some the specified layer.
This instruction is not required. If no FROM instruction is used, the target
is building from an empty base, with no dependencies.
Multiple FROM instructions are not supported.
From sources
Raptor supports multiple options for from-source:
| Type | Schema | Example |
|---|---|---|
| Raptor | <none> | FROM library.base |
| Docker | docker:// | FROM docker://debian:trixie |
Raptor sources
When no schema is specified, the from-source is assumed to be the module
name of another raptor layer.
This will be familiar to docker users. For example..
# Dockerfile
FROM base
..will depend on the docker image base
However, unlike docker files, raptor can point to raptor files in other directories, or even other packages. See module names for an overview.
Examples
# This will depend on `base.rapt`
FROM base
# This will depend on `library/debian.rapt`
FROM library.debian
Docker sources
To use a docker image as the basis for a raptor layer, specify the name of the
docker image, prefixed with docker://, e.g:
FROM docker://debian:trixie
There are multiple (optional) parts in a docker reference, which has a surprisingly intricate syntax.
Raptor supports the entire grammar for docker references, so anything that
docker pull will accept, should work with FROM docker:// in raptor.
Instruction RUN
The RUN instruction executes the given command inside the build namespace.
# enable the foo service
RUN systemctl enable foo.service
Arguments are executed as-is, i.e. without shell expansion, redirection, piping, etc.
This ensures full control over the parsing of commands, but it also means normal shell syntax is not available:
# BROKEN: This will call "cat" with 3 arguments
RUN cat /etc/hostname "|" md5sum
#   ^^^^^^^^^^^^^^^^^^^^^^^^^^^^ this will not work
Instead, /bin/sh can be called explicitly:
# This will produce the md5sum of /etc/hostname
RUN /bin/sh -c "cat /etc/hostname | md5sum"
Instruction ENV
The ENV instruction sets one or more environment variables inside the build namespace.
Example:
ENV CFLAGS="--with-sprinkles"
ENV API_TOKEN="acbd18db4cc2f85cedef654fccc4a4d8" API_USER="user@example.org"
The ENV instruction affects all instructions that come after it, in the same layer.
It is possible to overwrite a value that has been set previously:
FROM docker://busybox

ENV HITCHHIKER="Arthur Dent"
RUN sh -c "echo $HITCHHIKER" # outputs "Arthur Dent"

ENV HITCHHIKER="Ford Prefect"
RUN sh -c "echo $HITCHHIKER" # outputs "Ford Prefect"
Instruction WORKDIR
The WORKDIR instruction changes the current working directory inside the build
namespace. This affects all subsequent relative paths, including the RUN
instruction.
The workdir is not inherited through FROM.
The initial workdir is always /.
Example
# This will copy "program" to "/bin/program" (since initial directory is "/")
COPY program bin/program

# This creates /foo
RUN /bin/sh -c "touch foo"


# Switch to /usr
WORKDIR /usr

# The same command will now copy "program" to "/usr/bin/program"
COPY program bin/program


# Switch to /tmp
WORKDIR /tmp

# This creates /tmp/foo
RUN /bin/sh -c "touch foo"
Instruction WRITE
See the section on file options.
The WRITE instruction writes a fixed string to the given path.
A file can be added to the build output with COPY, but sometimes we just need
to write a short value, and COPY might feel like overkill.
Using WRITE, we can put values directly into files:
WRITE "hello world" hello.txt
Be aware that WRITE does not add a newline at the end of your input.
For text files, it is almost always preferred to end with a newline.
To do this, add \n at the end of the quoted string:
WRITE "hostname\n" /etc/hostname
The same file options as COPY and RENDER are accepted:
WRITE --chmod 0600 --chown service:root "API-TOKEN" /etc/service/token.conf
Instruction MKDIR
See the section on file options.
The MKDIR instruction creates an empty directory inside the build target.
This is roughly equivalent to the following command:
RUN mkdir /foo
However, using RUN mkdir requires the mkdir command to be available and
executable inside the build target. This is not always the case, especially when
building things from scratch.
Example
MKDIR /data

MKDIR -p --chown babelfish:daemon /usr/local/translate/
Instruction COPY
See the section on file options.
The COPY instruction takes one or more source files, and copies them to the
destination.
If multiple source files are specified, the destination MUST BE a directory.
| Input | Destination | Result |
|---|---|---|
| Single file | File | File written with destination filename |
| Single file | Directory | File written to destination dir, with source filename |
| Multiple files | File | Error |
| Multiple files | Directory | Files written to destination dir, with original filename |
| Directory | Any | Not yet supported |
Instruction INCLUDE
See the section on module names.
The INCLUDE instruction points to a Raptor include file (.rinc) to be
executed. When using INCLUDE, any number of local variables can be passed
to the included target.
For example, if we have previously made the file lib/install-utils.rinc that
installs some useful programs, we can use that file in build targets:
# Note: We use module name notation when including files
#
# The file is called `lib/install-utils.rinc`, which makes
#    the module name `lib.install-utils`
INCLUDE lib.install-utils
We can also make the component accept parameters, to make powerful, flexible components:
# hypothetical library function to update "/etc/hostname"
INCLUDE lib.set-hostname hostname="server1"
In the above example, we set the hostname of a server using an included component.
Since all values have to be specified as key=value, we might end up passing
variables through several raptor files. This often ends up looking like this in
the middle:
INCLUDE setup-thing username=username password=password
This is of course valid, but a shorter syntax exists for this case:
INCLUDE setup-thing username password
In other words, an include parameter name=name can always be shortened to name.
Instruction RENDER
The RENDER instruction renders a file from a template, and writes it to the
specified destination. It accepts the same key=value arguments as
INCLUDE. These arguments are made available in the template.
Example:
RENDER widgetfactory.tmpl /etc/widgetd/server.conf host="example.org" port=1234
The short form name (meaning name=name) is also supported here.
For example, in a component where host and port are available in the
environment:
RENDER widgetfactory.tmpl /etc/widgetd/server.conf host port
Instruction MOUNT
The MOUNT instructions only affects running a container, not building a
container.
See the section on mount types.
By using MOUNT, targets can specify certain resources (files, directories,
layers, etc) that should be made available when running the container.
Raptor mounts are identified by a name, which is used when running the
container, to declare what to mount.
When running a raptor container, a mount input is specified with the -M <name> <source> command line option.
The syntax -M <input> <source> can be a bit unwieldy.
Since certain mount names are very common, they have a shorter syntax available:
| Name | Long form | Short form |
|---|---|---|
| Input | -M input <foo> | -I <foo> |
| Output | -M output <foo> | -O <foo> |
| Cache | -M cache <foo> | -C <foo> |
For example, suppose we have a simple container (disk-usage.rapt) that just
calculates the disk space used by a mount:
FROM docker://debian:trixie

# Declare the mount "input", and place it at /input
MOUNT input /input

# Calculate the disk space used in /input
CMD "du -sh /input"
If we try to run this, we will get an error message:
$ sudo raptor run disk-usage
[*] Completed [675DE2C3A4D8CD82] index.docker.io-library-debian-trixie
[*] Completed [A24E97B01374CFEF] disk-usage
[E] Raptor failed: Required mount [input] not specified
As we can see, the container builds correctly, but fails because the input
mount is not specified.
To fix this, we specify the input mount:
sudo raptor run disk-usage -I /tmp
[*] Completed [675DE2C3A4D8CD82] index.docker.io-library-debian-trixie
[*] Completed [4BDD0649E00CA728] disk-usage
128M    /input
We could have specified -I /tmp as -M input /tmp, but the short form usually
makes the command easier to follow.
Mount type
The example have just looked will probably feel familiar to Docker users, since it is very similar to docker volumes, which are also bind mounts from the host to the container namespace.
However, Raptor mounts are more advanced than that.
For example, in order to build a Debian liveboot iso, we need to provide the
Debian live-boot scripts with a set of squashfs files, generated
from the individual layers of one or more raptor targets.
Docker does not easily provide access to container layers, as it is seen as more of an implementation detail.
In contrast, Raptor considers layers a first-class object, and makes them
available using the MOUNT instruction.
To learn more about different mount types, please see the mount types section.
Instruction ENTRYPOINT
The ENTRYPOINT instructions only affects running a container, not building a
container.
This instruction sets the entrypoint for the container, which is used when running commands in it.
The default value is ["/bin/sh", "-c"].
See the CMD instruction for details, including the relationship
between ENTRYPOINT and CMD.
Instruction CMD
The CMD instructions only affects running a container, not building a
container.
This instruction sets the default command for the container, which is used when running commands in it.
Unlike ENTRYPOINT, this instruction does not have a default value.
The semantics of the ENTRYPOINT and CMD instructions are heavily inspired by
Docker.
About the Docker design…
About the Docker design…
Many people find the Docker design of ENTRYPOINT and CMD confusing, and
unneccessarily complicated. So why duplicate it in Raptor?
We considered other options, but in the end, a redesign would have meant more complexity for people familiar with Docker, and the risk of confusing the semantics would increase.
So we are leaning towards what is familiar to some people, even though Raptor does not have the distinction between “shell form” and “exec form” that Docker has.
When running a container, the command will be run through the entrypoint.
The command can be specified on the command line. If no command is given,
the CMD instruction provides the fallback value. If no CMD instruction is
found either, the run will fail with an error.
The entrypoint is taken from the ENTRYPOINT instruction, if
present. Otherwise, the default value is used.
Example
As an example, let us consider a simple Raptor container:
FROM docker://debian:trixie

RUN apt-get update
RUN apt-get install -qy iputils-ping

ENTRYPOINT /bin/ping

CMD 8.8.8.8
This container will install the iptutils-ping package, containing the ping
command. Since /bin/ping is set as the entrypoint, the container can be
invoked to ping destinations:
$ sudo raptor run -L book book/example/ '$book.ping' 1.1.1.1
[*] Completed [675DE2C3A4D8CD82] index.docker.io-library-debian-trixie
[*] Completed [20D13F4B24A66D8B] ping
PING 1.1.1.1 (1.1.1.1) 56(84) bytes of data.
64 bytes from 1.1.1.1: icmp_seq=1 ttl=52 time=13.9 ms
64 bytes from 1.1.1.1: icmp_seq=2 ttl=52 time=15.2 ms
64 bytes from 1.1.1.1: icmp_seq=3 ttl=52 time=11.8 ms
^C
--- 1.1.1.1 ping statistics ---
3 packets transmitted, 3 received, 0% packet loss, time 2003ms
rtt min/avg/max/mdev = 11.762/13.613/15.190/1.412 ms
However, if no arguments are provided, we fall back to 8.8.8.8 (specified with
the CMD instruction):
$ sudo raptor run -L book book/example/ '$book.ping'
[*] Completed [675DE2C3A4D8CD82] index.docker.io-library-debian-trixie
[*] Completed [20D13F4B24A66D8B] ping
PING 8.8.8.8 (8.8.8.8) 56(84) bytes of data.
64 bytes from 8.8.8.8: icmp_seq=1 ttl=117 time=9.04 ms
64 bytes from 8.8.8.8: icmp_seq=2 ttl=117 time=9.24 ms
^C
--- 8.8.8.8 ping statistics ---
2 packets transmitted, 2 received, 0% packet loss, time 1000ms
rtt min/avg/max/mdev = 9.039/9.137/9.235/0.098 ms